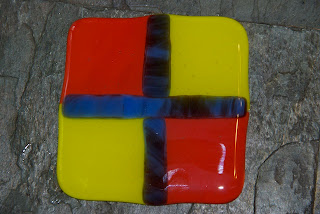
So far, I've only done 2 fires. Here's what I've figured out so far. Fire #1
I VERY quickly cut 90coe glass into a 4x4in clear glass for the top and 4 1x1 in colored squares of glass for the bottom.
 | Just before fusing. Next time I should make sure everything is lined up more exactly. |
 | Just after fusing. |
Then I did another fire with two new coasters using a modified design and refiring one of the coasters from the previous fire with a few pieces of glass on top.
| Starting Temp | Ending Temp | Rate Per Hour | Minutes to Hold |
| Room temp | 1100 | 300 | 0 |
| 1100 | 1240 | 150 | 30 |
| 1240 | 1480 | max | 10 |
| 1480 | 900 | 150 | 45 |
Lessons to remember for future fires:
- cut and line up glass very carefully
- a single piece of glass laid on top of a layer will, when it becomes liquid, ooze outwards a bit. Use only when you're ok with having that effect.
- I need an isolated circuit for my kiln


No comments:
Post a Comment